Showing posts with label Copic. Show all posts

Thursday, December 20, 2012

Mario & Luigi Birthday Card

Hi, guys!  I hope your day is going well.  We are in the middle of a "blizzard" here in Iowa.  I wish I could say that I got to stay home and craft all day but sadly, I had to be to work by 7am.  :(    But I did get to leave at 2:30 which allowed me to finish up the last of my Christmas cards.  Yes, I'm really late on sending them.  I just mailed the first round today so hopefully people will get them on time.  I will be posting some of them on here soon.

Okay, so on to the card I made.  My nephew Jackson turned 11 years old on the 16th.  I was fortunate enough to find some Super Mario Bros. images online.  Jackson and his brother are playing Mario Kart just about every time I go to their house.

The picture of Mario & Luigi is actually supposed to be a coloring book page but I resized it. 


The first thing Jack asked me when I arrived to his birthday dinner at Red Robin was "Did you make me a homemade card?"  


Happy Birthday, Jackson!  I hope you liked your card!

The soundtrack to making this card.

Red Robin...yuuuuummmmm!
~Jules    


Saturday, November 3, 2012

Pleasant Nightmares!

I miss my blog.  I haven't had a lot of time to be crafty because I'm working so much overtime at my job and any free time I do have I'm too exhausted.  But now that the holidays are upon us, I AM going to make time for this blog, no matter what.  

Halloween is my FAVORITE holiday!  I love dressing up; it's the one time of year where you're allowed to be someone else.

My friends and I throw a Halloween bash every year.  It's called the Worst Witch party.  It all stemmed from my friend Jennifer and my love for the classic 80's movie The Worst Witch starring a young Fairuza Balk, Tim Curry and Mrs Garrett from the Facts of Life.  What started as an innocent introduction of the movie to her then 3 year old has snow balled into this awesome get together that we now know as "Worst Witch".

I made up some invites for this shindig.

I got the adorable witch hats from The Cutting Cafe.  And I used Copic markers and Stickles.

What you will need:

  • Black cardstock base, folded at 6 1/4 x 4 1/4 inches
  • 3 different colors of cardstock cut to 6 x 3 1/2 inches.  I used purple, orange and lime green.  
  • Same 3 colors of cardstock cut to 5 1/2 x 3 inches.  
  • Same 3 colors of cardstock cut to 3 1/4 x 3/4 inches.  This will be the "tag" your sentiment goes on.  I printed the words "Mirror, mirror on the wall.  Who's the worst witch of them all?" for my sentiment.  It is a line from the title song of the Worst Witch movie.  
  • Halloween themed ribbon cut to 5 1/2 inches.    
  • Distressing ink, any color you like. 
  • markers
  • Halloween stamps


Here are all the supplies cut.


And here are my sentiment tags.  I only used 2 colors and I wish I would have made up some purple tags too.  

You just layer all of the cardstock, glue the ribbon on the bottom of your top cardstock, glue your witch hats to the top cardstock and put your party information on the inside of the card.  I had printed up my party info and used the cut little digi stamps from the above link.  I forgot to take a picture of the inside, unfortunately.  They were really cute though.  

 I made one of my friends an Iowa Hawkeye version of the card.


I also made some cute eating utensil holders.   It's as easy as it looks.  You just wrap Halloween themed scrapbook paper around your napkin and plastic utensils. This can be done for any holiday or event.


Here are some of the decorations I put up this year.  

I got this cute bat copper sculpture from AJ's Copper Garden.  The only bat I like.  


My cute dining room.


The spider house!  


I made the witch legs out off pool noodles, slapped some tights on them and put some funky platform shoes on.  I got the idea from Pinterest, of course.


I made caramel apples.  I dipped them in nuts, Reese's Pieces and chopped up Butterfingers.  I mother said hers was delicious!


And then I wrapped them.  


I made up some swag buckets complete with a box of Boogers!  

There were lots of yummy dishes at the party but one of my favorites was this Snake Calzone from Kraft.  

Costumes are optional at Worst Witch.  I always opt for costume!

I went as a pink haired living dead girl. I jokingly said I was Jem, 30 years later.  One day I will dress up as Jem but only when I'm able to do it right. 


My niece Chandler.  Also, please note the cute little witch shoe candle holder.  


Aniyah (the mummy) and Stacy (the witch) or as I like to say, Goldie Hawn at the end of Death Becomes Her.


My mom


Miranda came as Sally

The evening consisted of yummy, ghoulish foods, games, dancing and a viewing of the Worst Witch.  I think everyone had a good time.  I can't wait to plan for next year!  

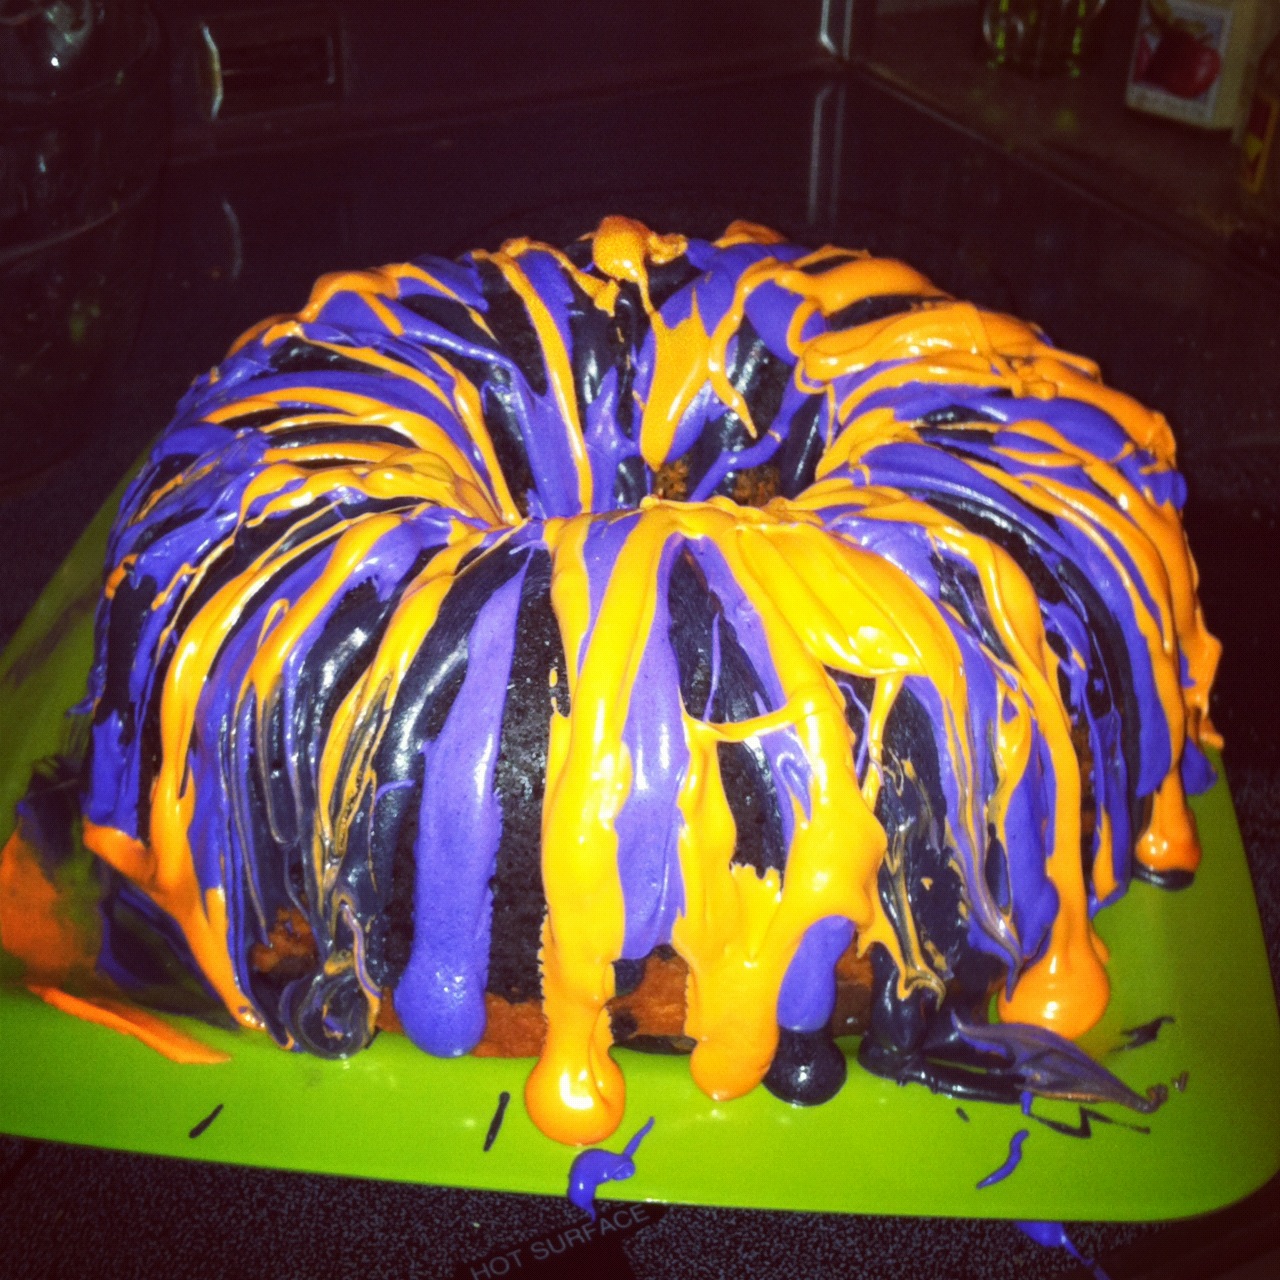
And lastly, I made this wonderful Halloween cake to take to work on Halloween.  


Look how beautiful the inside of it is!  

I took this to work and all but one little slice was gone.  The cake was so moist and sweet.  I'm definitely making it again.  I'll probably make a Christmas version.  

Here's where I got the recipe---> Cooking With Sugar


I can't believe it's all over! 

Thanks for reading!  I'll be blogging again soon.  Christmas is coming which means Christmas card making time!  

Anything can happen on Halloween, 
Jules

Tuesday, July 24, 2012

Corpse Bride Birthday Card For Josi

Happy Tuesday, all!  I hope you're beating the heat.

Josi turned 11 years old on July 18th.  She loves Tim Burton movies and even dressed up as the Corpse Bride a couple of Halloweens ago.  So naturally I thought of her when I saw the Tim Burton line from Simply Betty Stamps.  I've been holding on to this stamp for a very long time just waiting for Miss Josi's birthday.  I don't believe the stamp is available in rubber form anymore but the digi stamp, along with a whole bunch of other cool Burton stamps, are available at the above link.  I used Copic markers to color in.  As you can probably tell, I need to get more blue pens.  I don't do so hot coloring white people skin and I can't say I'm too impressed with my ability to do corpse skin either.  Practice, practice, practice...


The purple paper with the dark purple swirlies is from My Mind's Eye/"29th Street Market"/Carefree Adorable.  It is a double sided 12x12.  I used my Creative Memories oval cutter to cut the other side of the paper which is the light lavender paper under the stamp. I then centered the lavender paper and stamp over an iridescent eggplant colored card stock from Recollections.  


I found the "oh happy day" stamp at Michael's (in the dollar bin, always!).  I thought it was funny and was perfect for this card because it doesn't really fit.  I distressed it with 4 different Distress inks.  They are Worn Lipstick, Shabby Shutters, Spiced Marmalade and Dusty Concord.  I put it in the corner of the card and slapped some cutesie bling on the side.  

I have a rubber stamp pack that I bought at Michael's by Autumn Leaves Clear Stamps by Rhonna Farrer called "Flowers".  I used black ink and stamped them on all four corners of the card, overlapping all the layers of paper.  I then went over the stamps in Stickles "Cotton Candy".  

Yay, she got it in the mail and she liked it!

Happy Birthday, Josi!  And I meant what I said in your card.  I totally want to do a Tim Burton marathon with you.  Popcorn, candy, Mountain Dew and all!

Nice effin' model (honk honk), 
Jules

P.S.  The soundtrack to making this card.


Monday, July 9, 2012

Baby Boy Diaper Cake and Baby Shower Card

Happy Monday, everybody!  

My friends Matt & Candice are having a baby boy very soon!  They had their baby shower over the weekend.  I was excited because I've known for months that I would be making a diaper cake.  It's my go to baby shower gift.  They are surprisingly easy to make, you can spend as much money on them as you like and be as creative with them as you like.  


The "Boy Sock Monkey" diaper cake

WHAT YOU WILL NEED
  • 50 diapers (preferably size 1, as the baby may not stay in Newborn for too long)
  • a base.  I used a cardboard circle cake base but you can use any base you like.
  • a bottle of champagne or sparkling white grape juice
  • at least 3 receiving blankets
  • tape
  • twine
  • 3 safety pins (which I didn't use but wish I did)
  • 1 roll of decorative ribbon
  • a toy to put on top
  • cellophane 
The cardboard circle cake base.  You can get these at most places where you can buy cake decorating supplies.  


Roll each diaper.  The best way to do this is to keep the diaper closed (like it came out of the bag) and roll from the crotch up.  You can tape it shut.  Or you can use rubber bands, ribbon, twine, etc.  If you choose not to use the receiving blankets for the "frosting", you want to make sure you're rolling them with the white on the outside so the "characters" are not showing.  

The receiving blankets I bought came in a 4 pack so I decided to cover the cardboard base with one of them.  You take your bottle and place it in the center of the base.  

What I did was cut some twine not quite as wide as the base.  Then I tied the twine into a circle.  Once you start lining the diapers around the cake, the circle of twine will help you hold your diapers in place.  For the first tier, you'll need approximately 34 diapers.  You'll line them around the bottle.  The 34 diapers will go around the bottle approximately 2 and a half times.  The part that doesn't have 3 full rows will be the back of the cake.  

I folded the yellow receiving blanket and wrapped it around the first tier, letting it overlap the top of the tier.  Fasten the back of the receiving blanket with a safety pin.

Next move on to the second tier.  This will take approximately 11 diapers.  Do the same thing as the first tier and other receiving blanket.  I tied the twine around the receiving blanket because I didn't use safety pins in the back.  

And use the remaining 5 diapers for the top tier.  


The last receiving blanket on top.

Put the decorative ribbon around each tier, securing with tape.  And for the top of the cake, a nice stuffed animal will do.  Teddy bears are great.  I picked the sock monkey because Matt is a fan.  And I liked this one because it had the little blanket attached to it.  


Here's another diaper cake I did a couple of years ago to show you how it looks without the receiving blankets.  I rolled some wash cloths in the place of a few diapers.  

You can wrap these in cellophane, or netting.  Or you don't have to wrap it up at all.  For traveling purposes, I usually prefer to wrap it.  

I love diaper cakes!

And here's the card I made for Matt & Candice.  

This was my first time doing skin with Copics markers!  I think it went well.  I got the digi stamp from Melonheadz.  

The lime green star paper and the trucks come on the same doubled sided 12x12 paper from the company Bella Blvd/Baby Boy/"On the Go".   The stripes are also from a double sided 12x12 by Bella Blvd/Baby Boy/"Wild About You".  The other side was a giraffe print, hence the "Wild".  

It may not be noticeable in the picture but I used Distress Ink in "Shabby Shutters" around the edge of the digi stamp before placing on top of a blue card stock.  


It was fun to do a boy themed diaper cake and card!  I love shopping for babies and only wished I wasn't on such a tight budget.  

Biological clock still not ticking,
Jules
 (the "J" is pronounced as an "H" (Hules) but for this blog post only  ;-D )

Saturday, June 30, 2012

Happy Birthday To My Aunt Joyce

Summer is most definitely here!  My face is melting off!  I plan on staying inside all weekend with the air on and laying under my ceiling fan.

My aunt Joyce celebrated her birthday yesterday.  She is my dad's slightly older sister.  I say slightly because every year for one week only they are the same age.  Yes, my grandma and grandpa wasted no time after giving birth to Joyce!  


I wanted to make a card that was summery and that had a pop of color.  My friend Courtney gave me the table rubber stamp last year.  She got a huge box full of scrapbooking stuff at a garage sale and this happened to be in there.  The stamp is from Rubber Stampede and it's called "Dream Garden Table". I noticed there was one on Ebay if you really like it.  I used Copic markers to color it in.  The yellow green daisy paper came in a flower paper pack that I bought a long time ago.  And the daisy sticker is from  K&Company (Wild Saffron Daisies Paper Flowers).  


Thanks for looking!  I hope you liked my simple little card.  

And HAPPY BIRTHDAY to Aunt Joyce!

Your favorite niece (other than Candy & Kelly), 
Julie   

Tuesday, June 26, 2012

Ice Cream Birthday

My dad celebrated his birthday over the weekend.  I decided to make him a yummy birthday card.


The "Celebrate" paper is from Creative Imaginations.  I think it's out of print thought because I couldn't find it anywhere online.  The cool ice cream cone digi stamp is from Melonheadz.  And the Happy Birthday sentiment came from Tidbits Trinkets.  I used Distress Stickles on the ice cream.  


I had mentioned in a previous blog how Michael's has some really cute block stamps in their $1 bin and this "You're the Sweetest" is a prime example of that.  

Happy Birthday, Dad!  I hope you enjoyed your birthday weekend!  

Too tired to think of a smarty pants closing sentiment,
Jules

Saturday, June 9, 2012

A Berry Sweet Birthday Card

Hello everybody!  I hope you're having a glorious weekend.  I know I am!  Before I get into this birthday card, I wanted to give a little personal update on myself.  I just finished the first week of training at my new job at Transamerica as an annuity claims representative.  I was completely unfamiliar with annuities or anything financial other than a checking account so this is something new to me.  I've learned a lot and I feel like my brain is going to explode, hence me enjoying this weekend so much.  I took the weekends for granted during my 5 months of unemployment.  It's still too early to tell if I'll actually like my job but I love the company so far.  So that's where I'm at!

This birthday card is for my friend Jackie.  Jackie is a newer friend so I don't know a lot about her, making it harder to personalize the card.  What I do know about Jackie is 1) she's from Texas  2) she has a 1 1/2 year old little girl  3) she loves and used to work at P.F. Changs, thus introducing me to it  4) she's a crazy driver! and 5) she is in a relationship with one of my friends that I've known since the 3rd grade.  Okay, I do know more about Jackie (I always want to call her Action Jackson but don't know if she'd like that) but those are the main points!


The paper is another double sided 12x12 by the company Imaginisce-Berry Collection in Berry Patch.  The other side is the strawberry skin with all the seeds showing.  I think I'll use the leftover paper when I finally scrapbook a cookbook of my favorite recipes.  One day...

This adorable digi stamp is from The Adventures of Crafting Princess Bella Lockwood.  I've been dying to color this for a long time now.  I used Copics.  And I actually kept track of what I used.  

Stem:  YG03, G17
Strawberry: R27, E09, RV11
Plate: B14, B34, B39
And I used the Colorless Blender pen (0) here and there.


And it's pretty much a requirement to use "berry" instead of "very" in a strawberry themed card.  

That's my card!  Jackie, I hope you liked it.  And I hope you loved the cake Courtney made for you.  It looked AMAZING!  And most importantly, I hope you had a wonderful 29th birthday.  Just one more year and you'll be dirty 30 and old like the rest of us!  

May you always keep your berries safe from the Peculiar Purple Pieman,
Jules  


Saturday, March 31, 2012

A Birthday Card For My Nephew

My nephew, the eldest of my brother Todd's kids, turns 19 years old today!  It seems like just yesterday that I was a freshman in high school anxiously awaiting his arrival into this world.

I was excited because I got to play with my new Copic markers!  I have a limited amount of colors at this time but it worked out wonderfully.


The star paper is put out by Lily Bee Designs from their Picket Fence collection.  It's called "Seize the Day".  And I just tore some white and red card stock.  You know how I like that "scrappy" look.  ;p   I used crazy scissors to cut the yellow square in the middle.  I also used a different pair of crazy scissors to cut the lime green "Happy Birthday" sentiment.  

I have one of those "Happy Birthday" clear rubber stamp packets that I bought at Michaels which included the candles stamp.  

BLUE AND GREEN CANDLE:  B29 (Ultramarine),  B14 (Light Blue), G17 (Forest Green), YG03 (Yellow Green), Distress Stickles in "Folded Jeans"

YELLOW CANDLE (the Big Bird Candle!):  YR04 (Chrome Orange), Y13 (Lemon Yellow),  E09 (Burnt Sienna),   RV11 (Pink), Distress Stickles in "Milled Lavender"

GREEN CANDLE:  G17 (Forest Green), YG03 (Yellow Green), Distress Stickles in "Peeled Paint" 

FLAMES: R08 (Vermilion), YR04 (Chrome Orange), Y13 (Lemon Yellow), Stickles in "Icicle"

I put the Distress Stickles on the candles in the attempt to make it look like melting wax.  


Not bad for my second time working with Copic markers.  I look forward to improving!  Copics are kind of pricey so I'm slowly adding to my collection.  I ended up getting the primary colors and the skin tones.  

Coloring is fun!  

Be excellent to each other...and party on, dudes
~Jules