Wednesday, July 3, 2013

Daddio

I made 2 cards in the month of June, both for my dad.  1 for Father's Day and the other for his birthday on the 22nd.  I'm going to start with the Father's Day card.  


Unfortunately, I don't know the brand of any of the supplies for this one although I know I got the letters from Tuesday Morning.  

I put some junk food in a mason jar for presentation.  Presentation is half of the gift. 

My dad with his card. 


And on to the birthday card.  I also do not have the brand of any of these supplies.  I went with a gumball theme even though I'm pretty sure my dad doesn't chew bubble gum.  The only other theme that would have gone with the "Blowing birthday wishes your way" stamp wouldn't have been appropriate for this blog.  


There he is again!  

Bubble gum, bubble gum in a dish.  How many pieces do you wish?  

I hope you all have a wonderful 4th of July.  I plan on spending time with my family.  I will take a stab at that firework cake that has been floating around Pinterest.  I also will be making my highly requested tortilla roll-ups and some brownies.  

Stay safe and don't blow off your hand, 
Jules


Sunday, June 30, 2013

May Cards

Long time, no blog.  I wish I could say I've been living it up and have been too busy but sadly, I've just been too lazy.  

My first card was made for my friend, Jennifer's birthday. Here are the supplies: 
  • Paper from The Paper Studio "Tie Dye Lime"
  • Flowers from Dahlia Layered Burlap Flowers "Little Yellow Bicycle"
  • 1 paper lunch sack
  • I got the free printable maze from here: The Joy of Stamping.  


I bought the paper months before making the card.  I immediately thought of Jennifer when I saw this tie-dyed cloth paper.  I struggled with what I was going to use to decorate it with but decided "natural" was the theme I was going to go with.  Jennifer once showed me her Smash journal and inside I noticed a finger labyrinth.  So I was lucky enough to stumble upon the website with a free printable maze.  It also had the cute phrase "you're a-maze-ing".  I printed it on the lunch sack to keep with the natural theme.  

Jennifer and her nature card


Next up, Mother's Day!  
  • 1 fuchsia colored sold paper.
  • 1 turquoise colored solid paper
  • The Paper Studio "Poteeka  Butterflies"
  • Turquoise & White Silk Flowers by The Paper Studio "Spare Parts"
  • Monogram 3-D Sticker Embellishment Letters (in M & O) from The Paper Studio "La Petites"


My mom and her Mother's Day card


And a birthday card for my friend, Wendy!  
  • 1 piece of black solid paper
  • Bright Pink & Black Silk Flowers by the Paper Studio "Spare Parts"
  • Glittery leopard print paper from the Recollections "All Girl" paper pad
  • Solid pink paper for birthday sentiment
  • Stickles
  • "Happy Birthday" stamp


I outlined the glittery paper in Stickles

Wendy and Rhoda with the card.

I made Wendy some Scotcheroos and monster cookies!  


And here's a graduation card for my friend, Stacy's daughter Justice
  • The blue paper is by Bazzill "Mediterranean"  
  • The red paper is by Bazzill "Ruby Slipper"
  • Graduation gown and stars by Jolee's Boutique "Kindergarten Grad" (even though my grad was a high schooler!)
  • The "Congrats" sticker was by Soft Spoken


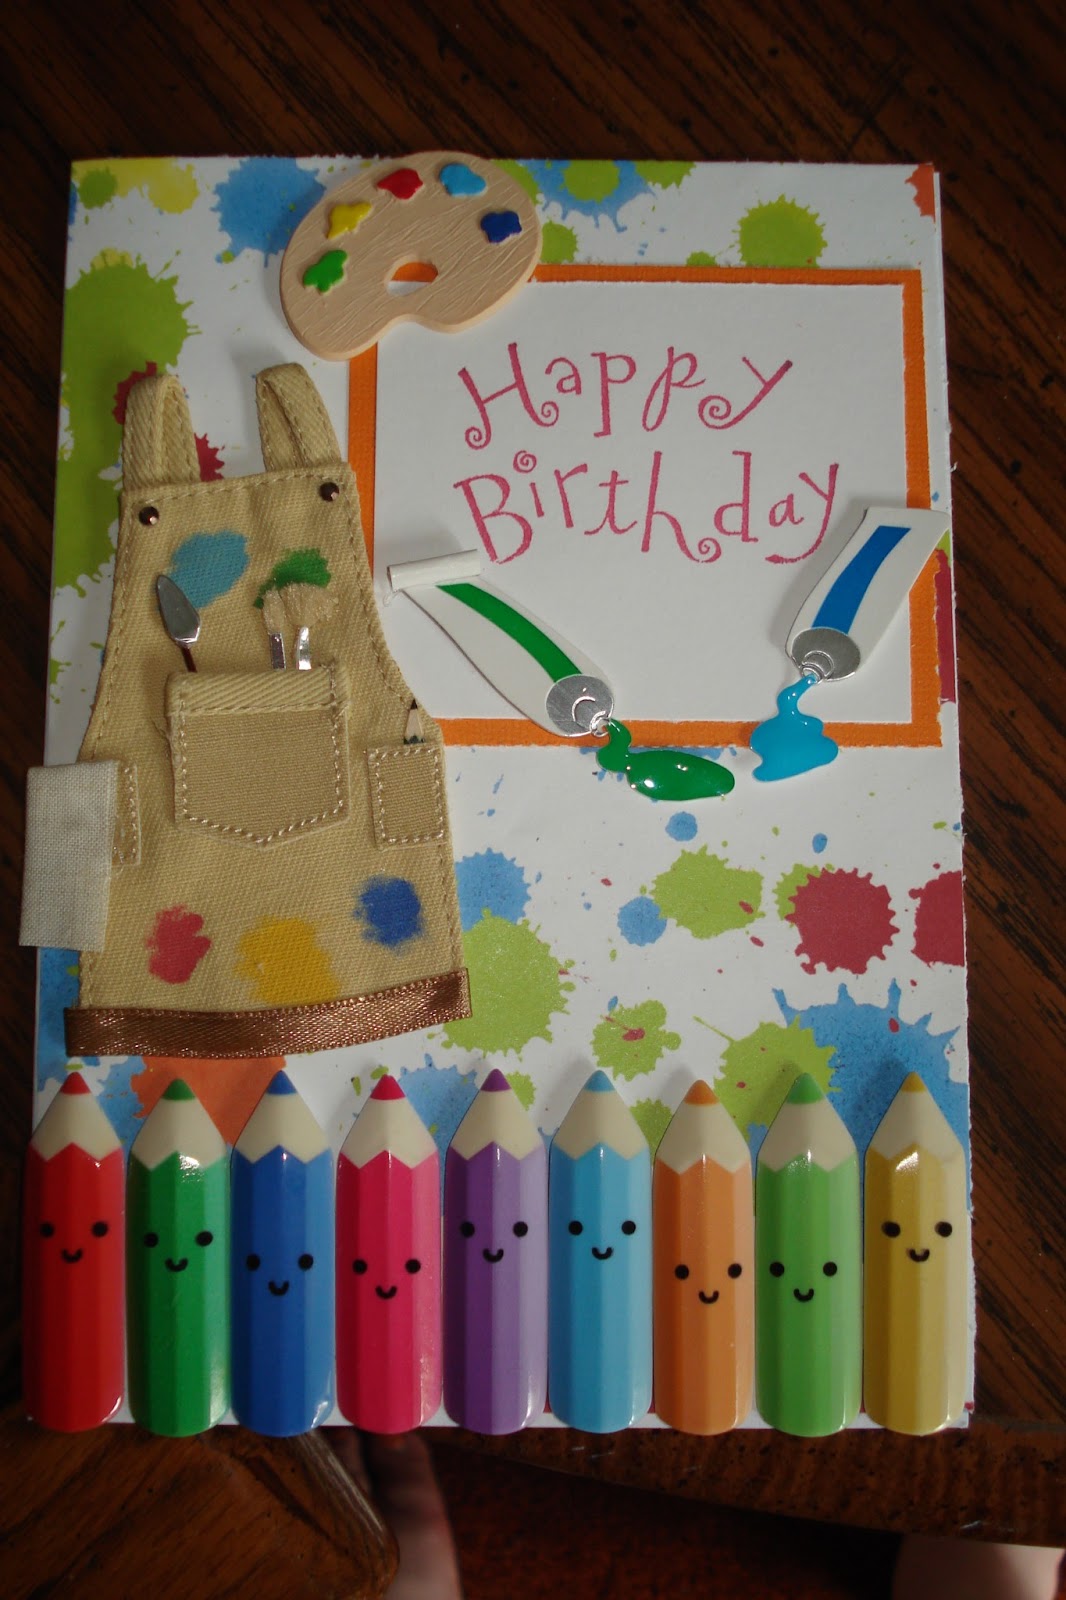
And last but not least, an artist themed birthday card for Miss Miranda!  
  • Paper is "Recollections "Multi Paint Splatter"
  • Smock and paint stickers from Jolee's Boutique "Artist"
  • Jolee's Boutique Stickers "Bright Colored Pencils"
  • Solid paper in orange
  • Solid paper in white
  • "Happy Birthday" stamp


7 year old Miranda holding up her card!  


I hope you enjoyed all of my cards!  See ya soon!  

Love, 
Miss Jules

The soundtrack to most of this card making:


Sunday, April 21, 2013

A Mermaid Card

Good afternoon!  I'm busy working away in my craft room today.  I can't tell you the last time my craft room has been cleaned top to bottom.  I can't even tell you the last time my craft table top has been spotless.  I've added so many fun craft paper and tools to my stash in the past year, I haven't had a chance to put it all away.  I actually plan on doing a craft room show and tell in the near future here in this blog so look out for that.

Let's get down to business!  I have another birthday card today.  This one is for my dearest friend Stacy.  She turned 35 years old last week and we celebrated over the weekend.  She wanted to be treated to dinner and a movie for her birthday so we ended up seeing Evil Dead.  What did I think of the movie?  I was entertained but it was more gruesome than scary.  That's pretty much how I feel about a lot of horror films of this generation.  I'm glad I saw it and will continue to see today's horror films hoping one of them will terrify me.  I hear they're remaking Poltergeist.  I'm kind of excited about that because the first one scared me.  Then again I was about the same age as Carol Anne when I saw it, had the same console television as her and was convinced I would get sucked into the damn thing.

Here's the fabulous birthday card I made for Miss Stacy!  I'm still learning how to color hair.  Unfortunately, I didn't have all the Copic markers to make the dark blonde that I wanted to.  Michael's had a limited selection and didn't have any in the E50's.  So I will be ordering some online soon along with a the colors for redheads and brunetttes.


The stamp came from Simply Betty Stamps.  It's a digital stamp from their Merkids line and it's on sale right now for $2, along with the rest of the Merkids.  I got the Christmas and Halloween stamps too.  

The sandy colored paper was from Core'dinations.  I couldn't find the actual name of it.  What I can tell you is I bought it from Joann's, it's kind of a sand color and it's glitzy.  

I bought the DCWV Linen Closet matstack cardstock pack that come in size 4.5 x 6.5 inches.  The pack comes with 72 pieces, some matte with texture, some shiny and some glittery.  For this card, I chose a matte blue with texture to place over the top of the sandy cardstock.  Then I chose a lighter blue glittery piece from the same pack and cut it into an oval shape with my Creative Memories oval cutter.   

Next I placed my Copic colored mermaid in the oval.  I adhered her with 3D stamps.  

I made the Happy Birthday tag with all three of the same paper, layered.  I used the boxy crazy scissors for the outside of the tag in hopes it would resemble a sand castle.  Nailed it!  

I found the My Mind's Eye "The Sweetest Thing" enamel dots at Michaels.  I placed them around the mermaid's head to look like bubbles.  

 I used some seashells for the bottom.  You can get these at most craft stores.  I just used regular Scotch glue.  

And to add some elegance, I adhered the Recollections Adhesive Faux pearls.  

Warning: Do not attempt to send this card in the mail! 

The sentiment comes from Fiskars "Make a Wish" quotes.

Stacy, the mermaid come to life!

Thanks for stopping by!  I loved making this card and I love the person I made it for!  

Whozits and whatzits galore, 
Jules

Sunday, April 14, 2013

Creating a Shadow Box Garden

Happy lazy Sunday to everybody!  I hope you're all enjoying your day.  It's a beautiful day here in Iowa.  The sun is showing its face here and there and the furnace hasn't kicked on too much today.  And for me, it's the best Sunday ever...a Sunday with no plans!

Last August two of my favorite squirrelfriends, Jennifer and her daughter Miranda, went to the Brucemore's Arts and Garden show.  Brucemore is a a mansion in Cedar Rapids, Iowa.  Every year they host an event where artists and garden vendors set up to sell their products.  We met a vendor called In the Country Garden and Gifts where I found a beautiful flapjack plant.


I fell in love with it, and the cost for the arrangement wasn't too terrible, so I purchased it.  We noticed they had a sign up page for classes on succulents in the Spring of 2013 so we signed up.  

I was so excited when I finally got the email with all the Spring classes.  I thought the shadow box gardens looked like the most fun.  

Jennifer, Miranda and I visited the country yesterday for the shadow box class.  And even though our allergies were kicking our asses, we had so much fun.  I highly recommend taking a succulent class of some sort.  

We got to choose from different size boxes (I chose the biggest, of course) and we also got to choose as many plants as we wanted to put in the shadow box.  

They had different sized drift wood, rocks and plant pots.  We were instructed to arrange our wood and plant pots first.  Here we are starting out!    


After you've arranged the wood and pots, then you add your plants.  In my shadow box, I used some pots to hold the plants.  I also placed a piece of drift wood across the box,  creating a bed to put my plant in.


Once your plants are placed, you can then add accessories such as pea gravel, mushrooms, moss, etc.  The shop had cute little ladybugs, flowers and butterflies for us to choose.  


Helping Miranda hot glue a butterfly accessory.  


Miranda & I helping each other with the pea gravel.  Or P Rock as we called it.  


Miranda and her finished products.  She ended up making another small garden.
Jennifer's finished product.


My finished product, minus a butterfly that I added on last minute.


It was great to see everyone's shadow boxes.  I think all of us in the class were being inspired by one another.  Once you start, it's hard to stop.  You just want to keep adding more.  

My shadow box will be hanging on my dining room wall, arranged with some family photos. And it will look fabulous!  

See ya in the garden,
Jules


Thursday, April 11, 2013

Birthday Cake

Happy Thursday, all!  We're almost there!  I don't know about you but I'm ready for this long, trying week to be over.  Bring on the weekend!  

My next card was one I sent to my friend Judy for her birthday.  


The green "Happy Birthday" paper is from DCWV in "Birthday Green".  It was originally a 12 x 12 in. sheet of paper that I cut down to 5 x 7 in.  And I used scraps for the rest of it.  The cake stamp is Fiskars clear stamps in "Birthday Party".  I used Copics to color however I didn't do much shading.  I did add some Stickles to the frosting on the cake for funsies.  And I used little lavender brads to adhere my "Happy Birthday" stamp which was also from the Fiskars "Birthday Party" set.  

Someone left the cake out in the rain
I don't think that I can take it
'Cause it took so long to bake it
And I'll never have that recipe again

Thanks for stopping by, 
Miss Jules


Wednesday, April 10, 2013

You're So Glam, You Sweat Glitter!

Hola!  Man, it's chilly out there.  I can't wait to crawl into my warm bed.

I have quite the shiny jewel for you all!  I made a glittery card for my friend Sara's birthday on April Fool's Day.


I got the green glitter paper from a Recollections 12 x 12 paper pad called "All Girl".  I also used the pink version to go under the "Happy Birthday" sign.  

All the little butterflies came on a roll from Recollections "Glitter on a Roll".  The big butterfly was borrowed from my mom and it also came from Recollections "Glitter Stickers".  

Very bright and Springy!  

Happy Birthday, Sara!   I hope you had a wonderful day!  I saw this picture the other day and thought of you, only because I know how much you love camping and you know how much I don't.  

Love, 
Jules 

Tuesday, April 9, 2013

He's a Lego Maniac

Hello! I hope all is going well with you. All is well for me in Iowa.  The weather is changing and it's getting me excited to have the first pedicure of the season.  And open toed shoes.  And cute dresses.  And hikes/walks with friends.

My nephew Zach celebrated his 11th birthday last week.  Since he's into Legos, I knew I had to make him a Lego card.


I got the cute red Lego paper from Joann's.  It's 12 x 12 Lego Classic Collection by Creative Imaginations cut to 5 x 7 inches.  And it's textured!  I've had the Lego stickers since the beginning of time so I'm not sure where they came from.    


If you're a child of the 80's or raised a child in the 80's you may remember this Lego commercial.  


Zach, the real Lego maniac

This was one of my favorite kid cards that I've made.  And you can step on this Lego card and not hurt your foot!  

Have a good one,
Jules